Unraveling Bias Tape At Joann: Your Ultimate Sewing Guide
For any sewing enthusiast, the name Joann conjures images of endless fabric aisles, a rainbow of threads, and an array of notions essential for bringing creative visions to life. Among these indispensable tools, bias tape stands out as a versatile and often misunderstood hero. Whether you're a seasoned seamstress or just beginning your journey into the world of fabric arts, understanding "bias tape Joanns" offerings is key to achieving professional-looking finishes on your projects. This comprehensive guide will delve deep into everything you need to know about this humble yet powerful sewing staple, specifically focusing on what you can find and how to best utilize it from your local Joann store.
Bias tape, in its essence, is a strip of fabric cut on the bias – meaning diagonally across the grain of the fabric. This unique cut gives the tape its remarkable flexibility and stretch, making it perfect for finishing curved edges, creating decorative accents, or adding structural integrity to garments and crafts. From necklines and armholes to quilts and home décor, the applications of bias tape are incredibly diverse. Joann, as a leading fabric and craft retailer, stocks a wide variety of bias tapes, catering to every project and preference. Navigating their selection effectively can elevate your sewing skills and the quality of your finished pieces.
Table of Contents
- What is Bias Tape and Why is it Essential?
- The Science Behind the Bias Cut
- Types of Bias Tape Available at Joann's
- Choosing the Right Bias Tape for Your Project
- Mastering Bias Tape Application Techniques
- DIY vs. Store-Bought Bias Tape: A Joann's Perspective
- Getting the Best Value from Joann's Bias Tape Selection
- Troubleshooting Common Bias Tape Challenges
What is Bias Tape and Why is it Essential?
Bias tape is, quite simply, a strip of fabric that has been cut on the bias grain. Unlike strips cut along the warp (lengthwise) or weft (crosswise) grains, which have minimal stretch, fabric cut on the bias possesses significant elasticity. This inherent stretch is precisely what makes bias tape so invaluable in sewing. It allows the tape to conform smoothly to curves, making it ideal for finishing necklines, armholes, and other rounded edges on garments without puckering or distorting the fabric. Beyond its functional role in finishing raw edges, bias tape also serves as a decorative element, adding a pop of color or a contrasting texture to a project. It can be used to create piping, define seams, or add a neat, professional border to quilts and home decor items. Without bias tape, achieving clean, durable, and aesthetically pleasing finishes on many sewing projects would be considerably more challenging, if not impossible, particularly for items with non-linear edges. It’s a foundational notion that every sewer, from beginner to expert, will encounter and appreciate.The Science Behind the Bias Cut
To truly appreciate the magic of bias tape, it's helpful to understand the "science" behind its unique properties. Fabric is woven with threads running in two primary directions: the warp (lengthwise threads, parallel to the selvage) and the weft (crosswise threads, perpendicular to the selvage). These threads are typically strong and stable, offering very little stretch. When fabric is cut at a 45-degree angle to these grains – this is known as the "bias" – the individual threads are no longer under direct tension in a single direction. Instead, they can shift and move, allowing the fabric strip to stretch and mold. This flexibility is crucial. Imagine trying to bind a curved neckline with a strip of fabric cut straight along the grain; it would pull, pucker, and refuse to lie flat. A bias-cut strip, however, gently stretches and eases around the curve, creating a smooth, even finish. This inherent give also makes bias tape incredibly durable, as it can withstand more stress and movement without tearing compared to a straight-grain strip. The ability to "give" is why bias tape is often preferred for areas of garments that experience frequent movement, ensuring comfort and longevity. This fundamental understanding of the bias cut underscores why "bias tape Joanns" offers are so popular – they provide this essential property in a convenient, ready-to-use format.Types of Bias Tape Available at Joann's
Joann Fabric and Craft Stores are a treasure trove for sewers, and their bias tape selection is no exception. You'll find a variety of types, widths, and materials to suit almost any project. Understanding these differences is key to making the right choice for your specific needs. The primary distinction you'll encounter is between single-fold and double-fold bias tape, but material and width also play significant roles.Single-Fold Bias Tape
Single-fold bias tape comes with both raw edges pressed towards the center, meeting in the middle. When you unfold it, you'll see three creases: one down the center, and one on each side where the raw edges were folded in. This type is typically used for finishing raw edges where only one side of the tape will be visible, or when you want a flatter, less bulky finish. It's often sewn to the right side of the fabric, then wrapped around the raw edge to the wrong side and stitched down. Single-fold bias tape is excellent for creating a clean, narrow binding or for reinforcing edges that won't be seen, such as inside a waistband or facing. It's also commonly used for creating simple casings or decorative trim that lies flat against the fabric.Double-Fold Bias Tape
Double-fold bias tape takes the single-fold a step further. After the raw edges are pressed to the center, the entire strip is then folded in half again, creating a tape with four layers and no exposed raw edges. One side of the double-fold tape is usually slightly narrower than the other, designed to ensure that when you stitch it down from the right side, your needle catches the back side of the tape, creating a clean finish. This type is the most common for binding raw edges, especially on necklines, armholes, quilts, and placemats, where both sides of the binding will be visible. It fully encloses the raw edge, providing a very neat and durable finish. Double-fold bias tape offers a more substantial and finished look compared to single-fold, making it a popular choice for visible bindings. Beyond the fold type, "bias tape Joanns" also offers variations in: * **Width:** Common widths include 1/2 inch, 7/8 inch, and 1 inch, referring to the width of the tape when unfolded (for single-fold) or before the final fold (for double-fold). The finished width will be much narrower. * **Material:** While cotton is the most common and versatile, you can also find polyester, satin, or even knit bias tape. Cotton is easy to press and sew, making it a great all-rounder. Satin bias tape adds a luxurious sheen, perfect for formal wear or decorative items. Knit bias tape, with its extra stretch, is ideal for knit fabrics that require maximum flexibility. * **Color and Pattern:** Joann's boasts an extensive color palette, from basic neutrals to vibrant hues, and sometimes even patterned bias tapes, allowing for endless creative possibilities. Understanding these options at Joann's empowers you to select the perfect bias tape that not only functions correctly but also complements the aesthetic of your sewing project.Choosing the Right Bias Tape for Your Project
Selecting the appropriate bias tape is a critical step that can significantly impact the success and finish of your sewing project. With the diverse range of "bias tape Joanns" offers, making an informed decision involves considering several factors: 1. **Project Type and Edge Shape:** * **Curved Edges (necklines, armholes):** Double-fold bias tape is generally preferred here due to its ability to fully enclose the raw edge and provide a clean finish on both sides. Its flexibility is paramount for smooth curves. * **Straight Edges (hems, placemats, quilts):** While double-fold works, single-fold can also be used for a flatter, less bulky finish, especially if one side will be hidden. For decorative straight edges, a wider double-fold might be chosen. * **Casings or Drawstrings:** Single-fold bias tape, unfolded, is excellent for creating narrow casings for elastic or drawstrings. 2. **Fabric Weight and Type:** * **Lightweight Fabrics (chiffon, silk):** Opt for narrower bias tape made from a lightweight material like cotton or a lightweight poly-cotton blend to avoid adding bulk. * **Medium-Weight Fabrics (quilting cotton, linen):** Standard cotton bias tape in common widths (1/2" to 7/8") is usually ideal. * **Heavyweight Fabrics (denim, canvas):** A wider bias tape might be necessary to adequately enclose the thicker raw edge. Consider making your own from a similar weight fabric if store-bought options are too thin. * **Knit Fabrics:** While cotton bias tape can work, knit bias tape (if available at Joann's) offers superior stretch and recovery, making it the best choice for knit garments to maintain their stretch and drape. 3. **Desired Finished Look:** * **Invisible Finish:** If you want the bias tape to be hidden (e.g., as a facing), single-fold is often used, or you might make your own from a matching fabric. * **Visible Binding:** Double-fold bias tape is the go-to for a clean, visible binding. Consider contrasting colors or patterns for a design element. * **Piping:** You'll need to insert cording into a single-fold bias tape to create piping. 4. **Color and Material Match:** * **Matching:** For a seamless look, choose bias tape that closely matches your main fabric in color and sometimes even material. * **Contrasting:** For a decorative pop, select a contrasting color or even a patterned bias tape. Ensure the material of the bias tape is compatible with your main fabric in terms of care instructions (e.g., don't use cotton bias tape on a dry-clean-only silk garment). 5. **Width Considerations:** * The stated width of bias tape refers to its unfolded width. A 1/2" double-fold bias tape will result in a finished binding that is about 1/4" wide. Always consider the finished width you desire. Wider tapes are easier for beginners to handle, while narrower tapes offer a more delicate finish. By thoughtfully evaluating these aspects, you can confidently select the perfect "bias tape Joanns" has to offer, ensuring a beautiful and durable finish for all your sewing endeavors.Mastering Bias Tape Application Techniques
Applying bias tape correctly can transform a good sewing project into a great one. While it might seem intimidating at first, mastering a few key techniques will make the process smooth and enjoyable. Whether you're using single-fold or double-fold bias tape from "bias tape Joanns," the principles remain largely similar, with slight variations for specific edge types.Attaching to Straight Edges
Attaching bias tape to a straight edge, such as a quilt border or a simple hem, is the most straightforward application. 1. **Preparation:** Press your bias tape if it's wrinkled. For double-fold tape, one side is usually slightly narrower; this is the side that will face up when you sew, ensuring you catch the back. 2. **Placement (Double-Fold):** Open up one fold of the double-fold bias tape. Align the raw edge of your fabric with the first crease of the bias tape (the one closest to the raw edge you just opened). The right side of the bias tape should be against the wrong side of your fabric. Pin generously. 3. **Stitching (First Pass):** Stitch along the crease line you just aligned, securing the bias tape to the fabric. Use a consistent seam allowance. 4. **Folding and Finishing:** Fold the bias tape over the raw edge of your fabric, enclosing it completely. The second fold of the bias tape should now cover your initial stitch line on the right side of the fabric. Pin in place. 5. **Final Stitching:** Topstitch close to the inner folded edge of the bias tape on the right side of your fabric. This will catch the back side of the bias tape, securing it neatly. For single-fold bias tape on a straight edge, you'd typically align one raw edge of the tape with the raw edge of your fabric (right sides together), stitch along the crease, then wrap the tape around to the wrong side and topstitch.Navigating Curves and Corners
This is where the magic of the bias cut truly shines. **For Curves (e.g., necklines, armholes):** 1. **Preparation:** Align the bias tape (opened, for double-fold) with the raw edge of your curve, right sides together. Do not stretch the bias tape or the fabric. Let the bias tape gently ease around the curve. Pin frequently, every 1/2 inch or so, to maintain the curve's shape. 2. **Stitching:** Stitch along the first crease line. Take your time, going slowly around the curve. 3. **Clipping (Optional but Recommended):** For tight curves, you may need to clip the seam allowance of the fabric (not the bias tape) towards the stitch line before folding. This helps the fabric lie flat. 4. **Folding and Finishing:** Fold the bias tape over the raw edge to the other side of the fabric, enclosing the raw edge. Pin carefully. 5. **Final Stitching:** Topstitch close to the inner folded edge. The bias tape will naturally conform to the curve, creating a smooth, professional finish. **For Corners (e.g., quilt bindings, placemats):** 1. **Start:** Begin stitching the bias tape a few inches from the first corner. 2. **Approaching the Corner:** Stitch until you are the width of your seam allowance from the corner point. Backstitch. 3. **Mitering the Corner (First Fold):** Fold the bias tape straight up, creating a 45-degree angle. The raw edge of the bias tape should align with the raw edge of your fabric. 4. **Mitering the Corner (Second Fold):** Fold the bias tape back down, aligning its folded edge with the next raw edge of your fabric. This creates a neat mitered corner. Pin in place. 5. **Continue Stitching:** Begin stitching again from the very edge of the fabric, continuing along the next side. Repeat for all corners. 6. **Finishing:** Once the entire binding is stitched, fold the bias tape over to the other side. At each corner, carefully fold the bias tape to create a neat mitered corner on the finished side as well. Topstitch around the entire project. Practice is key when it comes to bias tape. Don't be afraid to experiment with different widths and types of "bias tape Joanns" offers on scrap fabric until you feel confident. With a little patience, you'll be creating flawless finishes in no time.DIY vs. Store-Bought Bias Tape: A Joann's Perspective
The debate between making your own bias tape and purchasing pre-made "bias tape Joanns" offers is a common one among sewers. Both options have their distinct advantages and disadvantages, and the best choice often depends on your specific project, time constraints, and desired outcome. **Advantages of Store-Bought Bias Tape (from Joann's):** * **Convenience:** This is arguably the biggest benefit. Pre-made bias tape saves a significant amount of time and effort. There's no need to cut long strips, piece them together, or meticulously press them into shape. You can simply grab a package and go. * **Consistency:** Factory-produced bias tape is consistently cut and pressed, ensuring uniform width and a professional finish every time. This is particularly helpful for beginners who might struggle with precise cutting and pressing. * **Variety of Basic Colors:** Joann's carries a vast array of solid colors in common widths and materials (primarily cotton and poly-cotton blends). You can usually find a close match for most projects. * **Cost-Effective for Small Projects:** For a single project requiring a small amount of bias tape, buying a pre-packaged roll from Joann's is often more economical than buying a whole yard of fabric just to cut a few strips. * **Specialty Options:** Sometimes Joann's will stock specialty bias tapes, like satin or extra-wide varieties, that might be harder to source or make yourself. **Disadvantages of Store-Bought Bias Tape:** * **Limited Fabric Options:** While Joann's has many colors, you're limited to their pre-selected fabric types and patterns. You can't get a bias tape that perfectly matches a specific print or a unique fabric texture. * **Material Quality:** The quality of pre-made bias tape can vary. Some might be a poly-cotton blend that doesn't press as crisply as 100% cotton, or feel a bit stiff. * **Cost for Large Projects:** For very large projects, like a quilt requiring many yards of binding, buying pre-made bias tape can become quite expensive compared to making it from a yard or two of fabric. * **Color Matching Challenges:** While there are many colors, finding an *exact* match for a specific fabric can sometimes be difficult, leading to a subtle mismatch. **Advantages of DIY Bias Tape:** * **Perfect Match:** You can make bias tape from the exact same fabric as your project, ensuring a seamless and cohesive look. This is invaluable for garments where you want the binding to blend in. * **Customization:** You have complete control over the fabric type, print, and even the finished width. This allows for truly unique and personalized bindings. * **Cost-Effective for Large Projects:** If you need a lot of bias tape, making it yourself from a few yards of fabric is significantly cheaper than buying dozens of pre-made packages. * **Material Quality Control:** You choose the fabric, so you control the quality and fiber content, ensuring it will wash and wear similarly to your main project fabric. **Disadvantages of DIY Bias Tape:** * **Time-Consuming:** Cutting, piecing, and pressing bias strips takes considerable time and effort, especially if you don't have a bias tape maker tool. * **Requires Tools:** While not strictly necessary, a rotary cutter, mat, and a bias tape maker tool can greatly simplify the process, adding to initial investment. * **Skill Level:** Achieving consistently cut and pressed strips requires some precision and practice. **Conclusion for Joann's Shoppers:** For everyday projects, quick fixes, or when you need a basic solid color, the convenience and accessibility of "bias tape Joanns" offers are unparalleled. It's a fantastic resource for getting started quickly. However, for heirloom projects, items requiring a perfect fabric match, or very large undertakings, investing the time to make your own bias tape will yield superior results and often be more cost-effective in the long run. Many sewers keep a stash of both store-bought basics and make custom bias tape as needed.Getting the Best Value from Joann's Bias Tape Selection
Shopping at Joann's can be a rewarding experience, especially when you know how to maximize your savings and find exactly what you need. When it comes to "bias tape Joanns" offers, there are several strategies to ensure you get the best value for your money and your project. 1. **Utilize Coupons and Sales:** Joann's is famous for its frequent coupons (often 20% off your entire purchase, 50% off a single item, etc.) and sales events. Always check their app or website for current promotions before you shop. Bias tape, being a notion, is often eligible for these discounts, making it significantly more affordable. Stock up during these sales if you use a particular type or color frequently. 2. **Buy in Bulk (if available):** For some common colors and widths, Joann's might offer larger rolls or packages of bias tape, which often have a lower per-yard cost than smaller individual packages. If you know you'll use a lot of white, black, or natural-colored bias tape, buying a larger quantity can be a smart long-term investment. 3. **Check Different Sections:** While bias tape is usually in the notions aisle, sometimes specialty bias tapes (like those for quilting or home décor) might be located in other sections. If you can't find what you're looking for, don't hesitate to ask a store associate. 4. **Inspect Quality:** Before purchasing, briefly inspect the bias tape. Check for consistent width, even pressing, and good material quality. While Joann's generally carries reputable brands, a quick check ensures you're getting a good product. Stiff or unevenly pressed tape can be frustrating to work with. 5. **Consider Making Your Own for Specific Needs:** As discussed, if you need a very specific color, print, or material that Joann's doesn't offer pre-made, or if you need a large quantity, the best value might come from purchasing fabric at Joann's (especially when it's on sale!) and making your own bias tape. A yard of fabric can yield many yards of bias tape for a fraction of the cost of buying individual packages. 6. **Join the Joann's Rewards Program:** If you're a frequent shopper, signing up for their rewards program can lead to exclusive discounts, early access to sales, and personalized offers that can save you money on all your sewing supplies, including bias tape. 7. **Online vs. In-Store:** While it's great to see and feel the bias tape in person, check Joann's website. Sometimes they have online-only sales or a wider selection of colors/widths available for shipping or in-store pickup. Comparing prices online can also help you determine if you're getting a good deal. By being a savvy shopper and understanding the various ways to leverage Joann's offerings, you can ensure your sewing projects are not only beautifully finished but also budget-friendly.Troubleshooting Common Bias Tape Challenges
Even experienced sewers can encounter hiccups when working with bias tape. Fortunately, most common issues have straightforward solutions. Knowing how to troubleshoot these challenges will save you time and frustration, ensuring your "bias tape Joanns" purchases lead to successful projects. 1. **Puckering or Wavy Edges:** * **Cause:** This is often due to stretching the bias tape or the fabric while sewing, or not easing the bias tape around curves. * **Solution:** When sewing, avoid pulling the fabric or the bias tape. Let the machine feed the fabric naturally. For curves, pin very frequently (every 1/2 inch) and gently ease the bias tape around the curve without stretching it. Use a walking foot if your machine has one, as it helps feed multiple layers evenly. A lower presser foot pressure can also help. 2. **Bias Tape Doesn't Lie Flat:** * **Cause:** This can happen if the seam allowance isn't properly clipped on curves, or if the bias tape itself is too stiff for the fabric. * **Solution:** For curves, clip the seam allowance of the main fabric (not the bias tape) towards the stitch line before folding the tape over. For inside curves, clip V-shapes; for outside curves, clip wedges. If the tape is too stiff, consider using a softer material or making your own from a more pliable fabric. Pressing thoroughly after each stitching step is also crucial. 3. **Uneven Stitching:** * **Cause:** Inconsistent seam allowance, or not catching the back of the bias tape when topstitching. * **Solution:** Practice stitching in a straight line. Use a seam guide or the edge of your presser foot as a guide. When topstitching double-fold bias tape, ensure the slightly narrower side is on top; this makes it easier to catch the wider underside of the tape. Go slowly, especially around curves. 4. **Bias Tape Fraying:** * **Cause:** Poor quality bias tape, or handling it too much before sewing. * **Solution:** Purchase good quality bias tape from reputable brands (like those often carried at Joann's). If making your own, use a fabric that doesn't fray excessively. Work efficiently to minimize handling. Once stitched, the raw edges are enclosed, preventing further fraying. 5. **Bulk at Seams/Corners:** * **Cause:** Too much fabric in the seam allowance, or not trimming corners properly. * **Solution:** After stitching the first pass, trim the seam allowance of the main fabric (and sometimes the bias tape itself) to reduce bulk, especially at corners or where multiple seams meet. When mitering corners, ensure you're trimming away excess fabric within the fold before the final topstitch. 6. **Bias Tape Twisting:** * **Cause:** Not keeping the bias tape flat and untwisted as you apply it. * **Solution:** Unroll only as much bias tape as you need at a time and keep an eye on it to ensure it doesn't twist before it's sewn down. Pin frequently to hold it in place. By understanding these common issues and their solutions, you can approach your "bias tape Joanns" projects with confidence, turning potential frustrations into opportunities for learning and skill refinement. Remember, every stitch is a step towards mastery!Conclusion
Bias tape, whether purchased from "bias tape Joanns" or meticulously crafted at home, is an indispensable tool in any sewer's arsenal. Its unique ability to stretch and conform to curves makes it the ultimate solution for achieving clean, professional, and durable finishes on a wide array of projects, from garments to quilts and beyond. We've explored its fundamental properties, delved into the specific types available at Joann's, discussed how to choose the perfect tape for your needs, and walked through essential application techniques for both straight and curved edges. We've also weighed the pros and cons of store-bought versus DIY options, and provided practical tips for maximizing value and troubleshooting common challenges. Mastering bias tape application is a significant step in elevating your sewing skills, transforming raw edges into polished details. So, the next time you visit Joann's, take a moment to appreciate the humble yet mighty bias tape. Experiment with different widths and materials, embrace the learning process, and watch as your projects take on a new level of professional polish. What's your favorite type of bias tape to work with
Clover Bias Tape Makers- 2 Sizes | JOANN
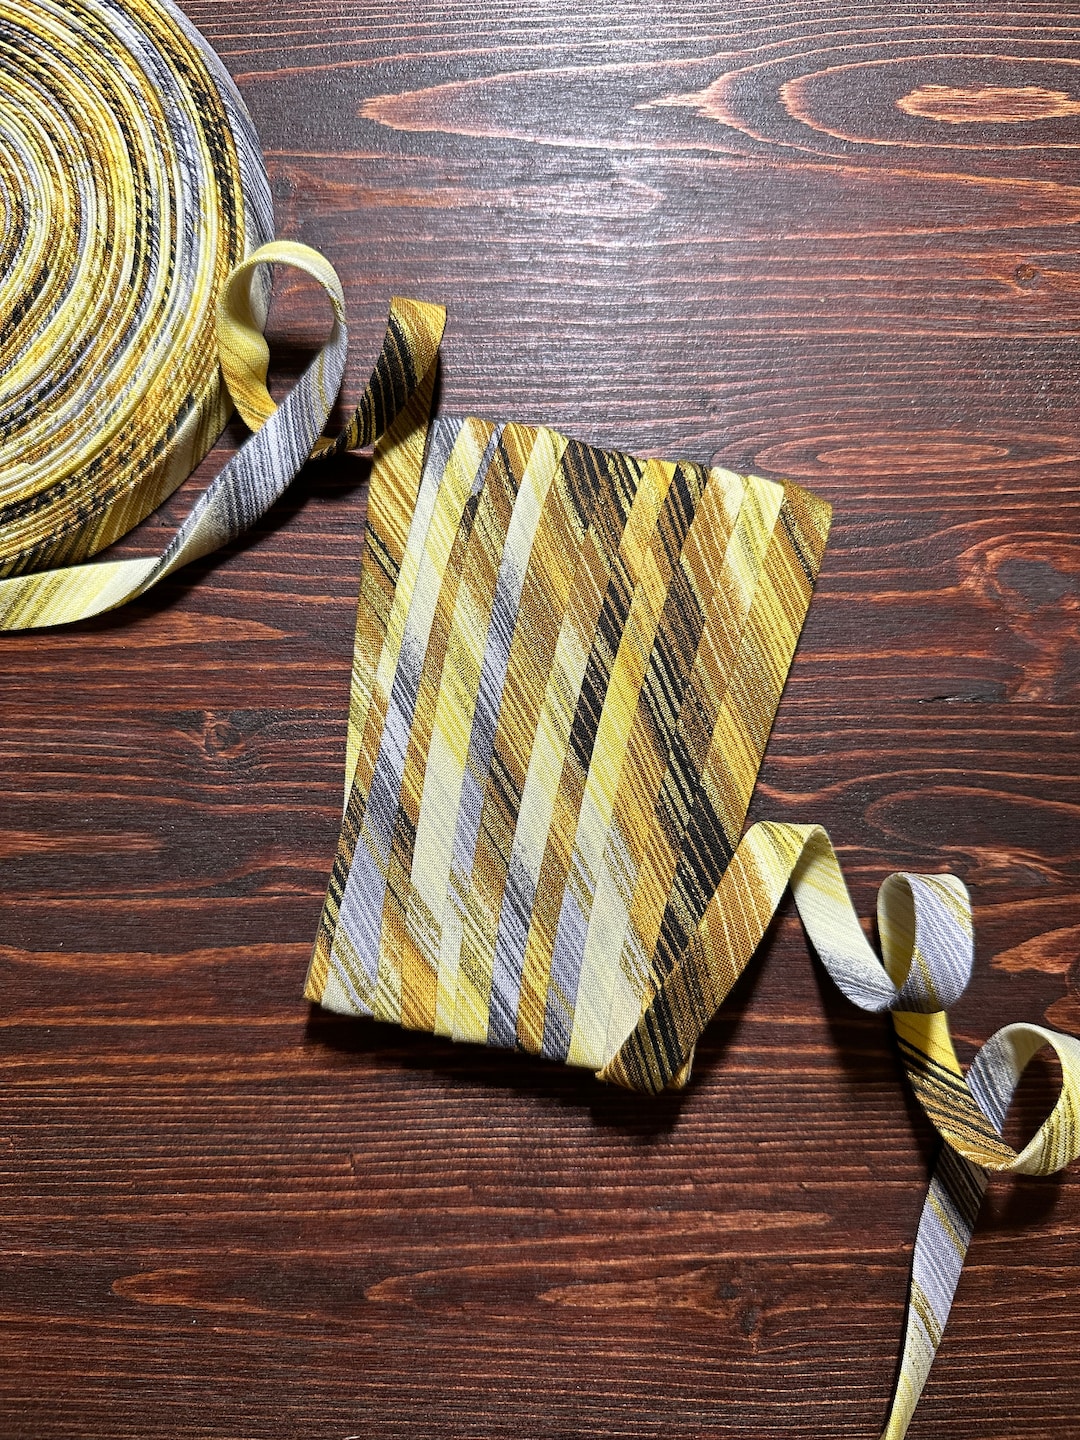
Bias Tape 1/2 Double Fold Bias Tape BY THE YARD Honey Metallic Stripe

Wrights Double Fold Bias Tape- 1/4'' x 4yds | JOANN
